This is a recipe my sister Fran posted on her Facebook page. It took me awhile to make it, but being cooped up in the house during the "Great Winter Storm of '09" inspired me to do some baking.
The first thing I thought of when I saw this recipe was how high in calories it was, so I made a few changes, reducing the fat and sugar content. The cake, which has a kind of custardy bottom and a crunchy top, turned out delicious - even with my attempts to lighten it up. Don't get me wrong, it still is very rich with a lot of calories (I don't even want to guess how many!), but it is heavenly. It called for whipped cream to top it but believe me, it doesn't need it. Here are the directions:
2 c. pumpkin puree
1 (12 oz.) can fat-free evaporated milk
4 eggs
1 c. white sugar
1/2 c. Splenda baking substitute
2 tsp. pumpkin pie spice
1 tsp. salt
1 (18.25 oz.) package yellow cake mix
1 c. chopped pecans (or walnuts)
1/2 c. melted margarine
whipped cream (optional)
Directions- preheat oven to 350 F
Lightly grease one 9 x 13 baking pan
Combine pumpkin, evaporated milk, eggs, sugar, pumpkin pie spice and salt.
Mix well and spread into prepared pan
Sprinkle yellow cake mix over top of pumpkin mixture and pat down. Sprinkle chopped pecans
over the top of the cake mix then drizzle the melted margarine all over the top.
Bake at 350 for about 1 hr. but no longer than 1 hr. 20 min. (insert a knife in the center, it should come out clean).
Top cooled cake with whipped cream when ready to serve, if desired.
Sunday, December 20, 2009
Tuesday, December 1, 2009
It's Soup Time!
 Image by thebittenword.com via Flickr
I've been trying to stay away from processed foods these days, as well as fast foods and foods that are high in fat and cholesterol. I'm not getting any younger; taking care of my body is getting more and more crucial as the years pass. The summer brought a bounty of fresh vegetables straight from the garden; now that those are nearly gone (there are still some greens to be picked out there), I'm actually going to have to buy stuff -- ouch!!
Since we're now into "soup weather," I've rediscovered some of my favorite soup recipes, one of which is Sweet Potato and Apple Soup. It's super easy and has very little fat. It goes great with some homemade croutons and a dollop of yogurt or sour cream. Try this soup; you'll be making it every winter.
Here are the ingredients:
Directions:
Heat oven to 400 degrees, prick the potatoes with a fork, place on a baking sheet and roast until tender (45 minutes to an hour, depending on the size of the sweet potatoes).
Meanwhile, heat the oil in a large sauce pan over medium-high heat--add the onion, celery and apple and cook, stirring occasionally until soft about 10-12 minutes.
Halve the potatoes, scoop out the flesh, then add to the saucepan, add 6 cups of water, the salt and pepper and other spices). Cook until heated through (8-10 minutes).
Puree the soup in the saucepan using an immersion blender (or working in batches, use a standard blender). Add more water if needed to reach the desired consistency.
Serve with croutons and a dollop of sour cream (and a garden salad, fresh from the back yard or the salad bar at Ingles, whichever is in season).
![Reblog this post [with Zemanta]](http://img.zemanta.com/reblog_e.png?x-id=6be347ae-9012-4c50-b2ed-a3d62d7ba6c7)
Sunday, November 1, 2009
A Very Vegan Vegetable Salad
In an effort to cut down on animal fats, Michael and I have been eating a lot more dishes containing beans and lentils. As I was looking through my collection of printed recipes, I came across this one which I have made several times over the past few months. It's incredibly versatile; I've substituted garbanzo and kidney beans for the black beans, and lemon juice for the lime juice. I made it again last night for a church supper we were having today. It got rave reviews and I only had a serving or two left to take home.
This recipe calls for Quinoa, which is a South American grain-like seed; you can find it at Earth Fare and the larger Ingles stores. It doesn't have much flavor, but it absorbs the dressing in the salad and gives the salad a crunchy texture. I've made it without the quinoa -- either way, it's a delicious, colorful salad that's good for you and contains heart-healthy fats.
Ingredients:
Rinse the quinoa in a fine strainer under running water until the water runs clear (quinoa has a soap-like film on it that makes it taste bitter so it needs to be washed off). Put in a small saucepan with a cup of water, bring to a boil, then turn down the heat to medium-low and simmer, covered for about 15-20 minutes until the water is absorbed and the quinoa is tender. If it sticks to the bottom of the pan a little, just take it off the heat and keep it covered for a few minutes, it will loosen. Transfer to a large bowl to cool (or you can place the pan in a shallow ice bath for about 15 minutes, stirring the quinoa every few minutes).
While the quinoa is cooking, marinate the beans and vinegar in a small bowl; set aside. In another large bowl, mix together the corn, pepper, onion, garlic and herbs. Whisk together the lime juice, pepper, salt and ground cumin; slowly drizzle in the olive oil while whisking to make an emulsion. Pour over the vegetables, add the beans and the cooled quinoa; mix well. Make this dish early in the day or the night before so it can chill and the flavors can marry.
This recipe calls for Quinoa, which is a South American grain-like seed; you can find it at Earth Fare and the larger Ingles stores. It doesn't have much flavor, but it absorbs the dressing in the salad and gives the salad a crunchy texture. I've made it without the quinoa -- either way, it's a delicious, colorful salad that's good for you and contains heart-healthy fats.
Ingredients:
- 1/2 cup Quinoa
- 1-1/2 cups canned black beans, drained (or substitute chick peas or kidney beans or a combination)
- 1-1/2 T. red wine vinegar
- 1-1/2 cups cooked corn (fresh is best but frozen is a good substitute - don't use canned)
- 1 red pepper, seeded & chopped
- 1/2 red onion, chopped or 4 scallions, sliced thin
- 1 t. garlic, chopped fine
- 1/4 t. cayenne pepper
- 1/4 cup fresh cilantro or flat leaf parsley, chopped fine
- 1/3 cup fresh lime juice (or lemon juice if you don't have lime juice)
- 1/2 t. salt
- 1-1/4 t. ground cumin
- 1/3 cup extra virgin olive oil
Rinse the quinoa in a fine strainer under running water until the water runs clear (quinoa has a soap-like film on it that makes it taste bitter so it needs to be washed off). Put in a small saucepan with a cup of water, bring to a boil, then turn down the heat to medium-low and simmer, covered for about 15-20 minutes until the water is absorbed and the quinoa is tender. If it sticks to the bottom of the pan a little, just take it off the heat and keep it covered for a few minutes, it will loosen. Transfer to a large bowl to cool (or you can place the pan in a shallow ice bath for about 15 minutes, stirring the quinoa every few minutes).
While the quinoa is cooking, marinate the beans and vinegar in a small bowl; set aside. In another large bowl, mix together the corn, pepper, onion, garlic and herbs. Whisk together the lime juice, pepper, salt and ground cumin; slowly drizzle in the olive oil while whisking to make an emulsion. Pour over the vegetables, add the beans and the cooled quinoa; mix well. Make this dish early in the day or the night before so it can chill and the flavors can marry.
Wednesday, October 28, 2009
Sauteed Greens, Asian Style
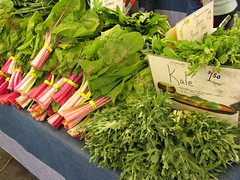 Image by flit via Flickr
Ingredients:
- Fresh greens -- whatever is available: Kale, Swiss Chard, Turnip Greens or Mustard Greens, about 1 to 1-1/2 lbs (serves about 2-3 people)
- 1 sweet onion, halved lengthwise and sliced into thin strips
- 3 cloves of garlic, minced
- 2 tablespoons Canola oil
- 1 tablespoon soy sauce
- 1 tablespoon dark sesame oil
- 1-1/2 teaspoons sugar
- Dash of rice wine vinegar (white vinegar works fine too)
Wash the greens and dry in a salad spinner (you may have to do this in batches). Cut the greens into smaller pieces and set aside. In the meantime, heat the canola oil in a large pot (I use my soup pot) over medium heat and add the onion. Saute the onion slowly until it is lightly browned and carmelized - about 5-7 minutes. Now add the garlic and saute for only about 1 minute, making sure it doesn't burn. Add the greens, blending them into the onions with tongs. You may have to wait until they start to wilt and reduce in size before adding more. Once the greens have wilted and reduced (which only takes about a minute), add the soy sauce, sesame oil and sugar. Blend well, turn down the heat to medium-low and cover; let simmer for about 5 minutes until the greens are tender. Add a dash of vinegar, stir and serve.
![Reblog this post [with Zemanta]](http://img.zemanta.com/reblog_e.png?x-id=2520ec93-a592-47bd-a166-53d94b937fe2)
Monday, October 26, 2009
Easy Chickpea Salad
Michael and I have been trying to change our diet so that we eat more grains, beans and foods rich in omega-3 fatty acids. We got this idea from several sources, but mostly by reading a couple of books authored by Dr. Andrew Weil.
I've been doing a lot of research on the so-called "Mediterranean Diet." The key foods consumed on this program are whole grains, beans or legumes, rice and pasta and -- of course -- olive oil. It's a very healthy way of eating, as long as it's done in moderation; it is by no means a low-calorie or low-fat diet.
I came across a recipe for Chickpea Salad that is fast, easy and delicious. It took me about 10 minutes to put it together; it's best to prepare the salad the night before so you can refrigerate it overnight to blend the flavors together.
Ingredients:
- 15.5 ounce can of garbanzo beans, drained
- 1/2 red onion, chopped
- 1 tomato, chopped
- 1/2 cup chopped parsley
- 3 tablespoons olive oil
- 1 tablespoon lemon juice
- Dash of red wine vinegar
- salt and pepper to taste
Directions
- In a large bowl, combine the chickpeas, red onion, tomato, parsley, olive oil, lemon juice, vinegar and salt and pepper to taste. Chill for 2 hours before serving. Taste and adjust seasoning. Serve.
Wednesday, September 23, 2009
Lightened Up Spaghetti & Meatballs
 Image via Wikipedia
Over the years I have developed my own version of Mama's Spaghetti and Meatballs. I don't spend as much time as Mama did, but the dish always comes out delicious. One thing I have done, in the interest of eating less red meat, was to use turkey in place of beef in the meatballs. My mom used a combination of beef and pork (usually 1 lb of ground beef and 1/2 lb of ground pork). These meats have a much higher fat content (and more cholesterol) than the much leaner ground white meat turkey. The only problem with ground turkey is that because it's so lean, that usually means the meatballs will be dry. I've found a few remedies for this problem, however. First of all, I sometimes will mix the lean white meat ground turkey with some ground turkey that has a higher fat content (meaning it contains some dark meat). If I'm making 2 lbs of meatballs, I will use 1-1/2 lb of white meat ground turkey and 1/2 lb of ground turkey (85/15 or less). If you only have the white meat (97/3) ground turkey, you can add about 1-1/2 tablespoons of extra virgin olive oil to the meatballs. Another thing I've done to lighten up the meatballs is to cook them in the oven instead of on the stove, soaking in oil. And lastly, make sure you let the meatballs cook in the sauce for at least an hour so they can absorb the flavor (and the moisture) from the sauce.
Below you will find my turkey meatball recipe. Make sure you season them well as ground turkey can be pretty tasteless.
2 lbs of lean white meat ground turkey (or a combination of 97/3 turkey and 85/15 or 80/20 turkey)
1 large egg
1/4 cup milk (or more if needed)
1 cup seasoned bread crumbs
1/2 cup freshly grated romano or parmesan cheese
2 tablespoons extra virgin olive oil
3 garlic cloves, minced very fine
1/2 teaspoon onion powder
1 teaspoon salt
1/2 teaspoon ground black pepper
Preheat oven to 350. Combine all ingredients together with your hands. If the meat feels too dry, add a little milk; if it's too wet, add a few more bread crumbs. Cover two cookie sheets with aluminum foil, then spray with some cooking spray. Roll the meat into balls - the size is up to you; I like them about the size of a large golf ball. Place the meatballs on the cookie sheets. It should make 24-30 meatballs. Cook the meatballs for about 10 minutes, then turn and cook 5 minutes more. Drain on paper towels, then add to your favorite marinara sauce and let the meatballs cook in the sauce for about a half hour to an hour. Serve over your favorite pasta - it doesn't always have to be spaghetti!!!
![Reblog this post [with Zemanta]](http://img.zemanta.com/reblog_e.png?x-id=7b9cc685-aeab-4efb-8abb-eeeb74456d1b)
Tuesday, September 15, 2009
My version of Spanish Rice
This is another one of those recipes that Mama used to make for us regularly, only I put my own spin on it. The measurements don't have to be exact - mine never are! Just taste as you go along and adjust accordingly.
Ingredients:
1 lb ground beef, preferably lean
1 T olive oil
1 onion, finely chopped
1 green bell pepper, finely chopped
1 clove garlic, finely chopped
1 can petite diced tomatoes, seasoned with green chilies
1 cup white rice (uncooked)
1-1/2 cups water
1 T chili powder
Salt & pepper to taste
Shredded Monterey Jack & Cheddar Cheese blend
In a large skillet with a tight-fitting lid, brown the ground beef in the olive oil until all the pink is gone; drain out the fat. Add the onion, pepper and garlic and saute until lightly browned. Add the tomatoes, rice, water, chili powder and about 1/2 tsp. salt and pepper. Bring to a boil; turn the heat down to a simmer and cover. Cook for about 15-20 minutes until the rice is cooked through. If the rice is still a bit soupy, remove the cover and let it simmer on the stove for another 5-10 minutes until some of the liquid is absorbed. Check for seasoning and add some ground red pepper if you want more fire. Now add the cheese and mix in to melt the cheese. Enjoy!
Thursday, September 10, 2009
Eggplant Parmigiana
 Image via Wikipedia
For this dish, you will need about 3 small eggplants. Make sure you select eggplants that are small, then the seeds inside will also be small. I'm not a fan of big eggplant seeds so I made sure that we picked the eggplant when it was small. Slice the eggplants lengthwise, about 1/4" thick. Place the slices on a clean kitchen towel (or a double thickness of paper towels) and sprinkle both sides with salt. Let the slices sit for about 1/2 hour, then blot the excess liquid from the slices. This step is necessary to remove a lot of the moisture from the eggplant, as well as some of the bitterness. While the eggplant is doing its thing, take out two shallow bowls. In one, place about 1 cup of flour, seasoned with salt & pepper. In the other, add two eggs, beaten. Heat a large non-stick skillet over medium heat, then add about 2 T olive oil and 2 T vegetable oil. Set up the bowls like an assembly line: first the flour, then the egg, then the skillet. Dip the dried eggplant first into the flour; shake of any excess. Then dip into the egg, making sure it is coated well. Now place into the skillet, a few pieces at a time. Don't crowd them in the skillet; they need room to breathe. Fry until golden on each side, then remove to a plate lined with paper towels. Set aside.
Now that the eggplant is all fried up, it's time to assemble everything. Here's what you'll need:
1 8-oz container of part skim ricotta cheese
1 egg
1/4 cup grated romano or parmesan cheese, or a combination of both
3 cups marinara sauce (preferably homemade but if not, then at least a good quality brand)
2 tablespoons pesto
2 cups grated mozzarella cheese
Mix the egg with the ricotta cheese in a mixing bowl, and add about 2 tablespoons of the grated romano cheese. Mix in about 2 tablespoons of water so the mixture is just a bit soupy. Heat the marinara sauce in a skillet, add the pesto and let the sauce simmer for about 10 minutes. In a large casserole dish, place some of the sauce (2 or 3 ladels-full) in the bottom of the dish. Now make a layer of eggplant. On top of the eggplant layer, spoon out about 1/2 of the ricotta cheese mixture and spread it around, then top with about 1/3 of the mozzarella cheese and a couple tablespoons of romano cheese, then top with marinara sauce. Start again with the eggplant, then ricotta cheese, mozzarella cheese and sauce. Top with more eggplant, then sauce and finally mozzarella cheese and romano cheese. Place in a 375-degree oven for about 45 minutes. If the cheese is getting too brown, cover with foil for the last 15 minutes or so.
Serve with extra sauce, a salad and plenty of hot Italian bread. Mangia!
![Reblog this post [with Zemanta]](http://img.zemanta.com/reblog_e.png?x-id=3bc2c13e-f41d-4b0b-a318-630f2f84c457)
Sunday, August 30, 2009
Sun-dried Tomatoes
 Image via Wikipedia
Directions:
Turn the oven on at 250 degrees. Wash about 20 small tomatoes, halve lengthwise and remove the stem area. Place the tomatoes cut-side up on cookie sheets that have been fitted with racks (I used my cake-cooling racks). Drizzle with a small amount of olive oil, some dried basil and some black pepper (don't salt them - they're salty enough). Let them sit in the oven for about 8 hours. Check them after about 6 hours to make sure they're not getting too dark. If they are, open the oven door for the remaining time. Remove from the oven and let them cool on the racks, then place them in a glass jar and cover with olive oil. They can be stored in the pantry or in the fridge.
What to do with those sun-dried tomatoes? I made a cheese ball by adding about 8 chopped sun-dried tomatoes, 2 tablespoons of pesto and 1/4 cup grated parmesan cheese to 2 cups of cream cheese. Place into a small round bowl which has been fitted with plastic wrap. Pack it in pretty tightly, then cover with the ends of the plastic wrap. Chill in the refrigerator for at least 2 hours, then unmold and decorate with toasted pine nuts. Serve with toasted bread rounds or pita chips.
Other ideas for sun-dried tomatoes: snip 4 or 5 pieces into your Pasta Primavera, or add to your favorite tomato sauce. You can also make a simple pasta dish by adding chopped sun-dried tomatoes, crumbled goat cheese and cooked Italian Sausage to cooked penne pasta. Make sure you add a generous amount of grated Romano Cheese! And of course, you can always make a pizza with sun-dried tomatoes, chopped fresh spinach (which has been barely steamed), and a nice sharp cheese like goat cheese or provolone.
![Reblog this post [with Zemanta]](http://img.zemanta.com/reblog_e.png?x-id=c686afcf-c692-4681-a766-e58bf8b271d6)
Monday, August 10, 2009
My Search for Canning Supplies
 Image via Wikipedia
I spent about 2-1/2 hours this afternoon and literally went in circles, trying to find supplies for canning. I've never canned anything before, so this was definitely a learning experience for me. I started this morning, pulling out my mason jars. I had about eight pint jars and about a dozen quart jars with no lids. I have a large stock pot so I thought if I could find a rack for inside that pot, I would be able to fit seven jars in the pot. I would also need a jar lifter. So I hit the highway.
I started out at Walmart. Their canning supplies consisted of two canners with rack ($18.97), a canning tools kit (including a jar lifter), and miscellaneous mixes for pickles, jams, etc. I did not find anything to use as a canning rack. I decided to hold off on buying anything until I hit a few more stores. This being a small town, I didn't have many choices.
I headed down to Canton since I thought the canning supplies would be more plentiful there - I had assumed that more people canned in Canton (no pun intended). I stopped at Fred's and Maxway (Big Lots-type stores) but found nothing but a few canning jars. I then went to Cold Mountain Hardware. That was a neat store -- a hardware store in the front and a junk/antique store in the back. They did have a few canners there, but nothing under $50. They also carried jar lifters at $9.99. Walmart had a whole little canning tools kit which included a lifter and funnel and a couple of other doodads for $6.97 -- so I did not get that jar lifter. I did pick up a really nice basket, though; nice and deep with a wooden handle, perfect for harvesting our garden bounty. Since it was my first time shopping there, the proprietor gave me 20% off, so the basket came to $8.00. I also picked up an item that I'm hoping Michael will be able to use as a birdbath -- it's a garbage can lid, galvanized and brand new. I couldn't resist picking it up at $1.49.
My quest took me back to Waynesville, this time to another hardware store. By this point I had given up on finding a canning rack and decided I would just buy a whole new canner. They did have some, including a 7-jar canner (which was $18.97 at Walmart), which they wanted $24.99 for. The jar lifter they had was $7.99. I walked out with nothing. Back in the car, this time to KMart. They had one canner, which was a kit consisting of a 7-jar canner (same size as the one at Walmart), a canning rack and a canning tools kit. The price was $50.00. They had several boxes of pint jars and one box of quart jars, which was $9.99. Again, I walked out with nothing.
Back in the car, this time back to where I started -- Walmart! I was worried that two hours had gone by and they might not have any of those canners left. I was quite surprised to see a whole new display of canners! They had also restocked the quart canning jars. I walked out of Walmart $39.00 later, but happy. I now have a new canner, a canning tools kit, another dozen quart jars and new lids for the jars at home. A great investment that will last me years.
I probably would have saved a lot of time and money by just getting the canner at Walmart when I first saw it, but I really did get an education in canning supplies for this area. Sometimes we have to learn things the hard way. I have also come to the conclusion that, even though I would like to patronize our local merchants, when it comes to saving money you just can't beat Walmart. I saved myself at least $30 today just by shopping around.
My next step will be the actual canning process. This should be interesting!
![Reblog this post [with Zemanta]](http://img.zemanta.com/reblog_e.png?x-id=c7564106-9304-45e4-ac6a-6ff797e04266)
Monday, August 3, 2009
Italian Vegetable Saute
 Image by Merelymel13 via Flickr
Ingredients:
1 onion, halved lengthwise and sliced into 1/4" slices
1 green or red bell pepper, sliced into 1/4" strips
1 zucchini, quartered lengthwise and sliced into 1/4" pieces
2 medium tomatoes, coarsely cut up (don't squeeze out the liquid)
3 cloves garlic, chopped
6 or 8 basil leaves, thinly sliced
olive oil
Preparation:
Heat a large saute pan over medium heat. Coat the bottom with about 1 tablespoon of olive oil and add the peppers and onions; saute for a few minutes until lightly browned. Add the garlic and the zucchini and cook for a few more minutes until the zucchini have browned and are getting tender. Add the tomatoes and cook for another few minutes until they have broken down and become a bit saucy. Season with salt & pepper, top with fresh basil and a sprinkle of olive oil.
This dish is best served warm (not piping hot), scooped onto a piece of Italian or French Bread. Save some bread for wiping up all that delicious left over sauce -- that's the best part!
![Reblog this post [with Zemanta]](http://img.zemanta.com/reblog_e.png?x-id=64b8e44e-e5be-461a-b0f9-dd8eae1626be)
Wednesday, July 29, 2009
Grilled Tuna with Herbed Aioli
 Image by roger_mommaerts via Flickr
Ingredients:
- 1/4 cup olive oil
- 2 tablespoons red wine vinegar
- 2 tablespoons chopped fresh basil
- 2 teaspoons chopped fresh thyme
- 2 teaspoons dried tarragon
- 2 large garlic cloves, finely chopped
- 1/3 cup mayonnaise
- 4 7-0z tuna steaks (each about 1 inch thick)
Whisk together first 6 ingredients in shallow dish for marinade. Place mayonnaise in separate small bowl. Whisk in 1 1/2 tablespoons marinade. Set aioli aside.
Sprinkle fish with salt and pepper. Place fish in marinade in dish, turning to coat evenly. Marinate 1 hour at room temperature, turning fish occasionally.
Oil grill rack. Prepare barbecue (medium-high heat). Grill fish to desired doneness, about 3 minutes per side for medium. Top fish with aioli and serve.
![Reblog this post [with Zemanta]](http://img.zemanta.com/reblog_e.png?x-id=7d3f00c6-8376-4a36-90d4-d3478ecd5e3a)
Thursday, July 23, 2009
More Cheap Eats from the Garden ....
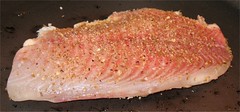 Image by sweet mustache via Flickr
Here's what was on the menu:
- Pan-seared Tilapia with Cajun spices;
- Garlic & Parsley Red Potatoes; and
- Tomato Salad with Red Onion and Basil.
I found Tilapia (previously frozen) on sale at Walmart for $4.68/lb. The package I bought cost $5.04. I rubbed in some Cajun seasoning and Old Bay seasoning and let it sit for about 15 minutes at room temperature. I then added a bit of Extra Virgin Olive Oil (or as Racheal Ray says, "EVOO") to a cast iron skillet and sauteed the fish for about 3-4 minutes per side. I put it on a serving platter and squeezed some fresh lemon on top. Total Cost: about $5.50.
Potatoes
I still had some small red potatoes left over from our potato harvest about a month ago. I boiled about a pound in some water to which I added about a teaspoon of salt and 2 cloves of smashed garlic. I cooked them until just tender (about 15 minutes) then drained them, added about a tablespoon of margarine and topped them with some chopped fresh parsley from the garden. Total Cost: since most of the ingredients came from the garden (except the margarine), I estimate about $1.00.
Tomato Salad
I sliced up three tomatoes that we picked this afternoon. I then sliced a red onion, also from the garden (picked about 3 weeks ago and cured). To the tomatoes and onion, I added about a tablespoon of EVOO, a splash of red wine vinegar and salt and pepper, and gently mixed it all together. I garnished the salad with about 1/4 cup of fresh chopped basil leaves. Total Cost: since most of the ingredients cam from the garden, I estimate about $1.00.
There it is, a great-tasting, healthy meal for about $7.50 -- maybe $8.00 -- for two people -- That's $3.75-$4.00 per person. It's amazing how much we are saving by having our own garden!
![Reblog this post [with Zemanta]](http://img.zemanta.com/reblog_e.png?x-id=e674808a-f8d0-45f4-b564-b0067f557a63)
Tuesday, July 21, 2009
An update on Squash Blossoms
I experimented a little today with some squash blossoms -- I wanted to try and oven bake them rather than cook them in oil. I also thought I would stuff them with some mozzarella cheese. They turned out delicious, but they were a bit tricky to prepare and keep the cheese inside the blossoms. Here's how I did it:
Ingredients:
These are best straight out of the oven, while the cheese is nice and gooey. They may be a little tricky to make, but they are so worth it!
Ingredients:
- 12 squash blossoms, stamen removed and rinsed (try to pick them while the blossoms are open, they will be easier to stuff).
- 3 large eggs, beaten - place in a shallow dish or tray for dipping the blossoms.
- 1 cup finely shredded mozzarella cheese
- 6 large basil leaves, chopped fine
- Garlic powder, onion powder, salt & pepper to taste
- 1 cup seasoned bread crumbs - place in a shallow dish or tray for rolling the blossoms.
These are best straight out of the oven, while the cheese is nice and gooey. They may be a little tricky to make, but they are so worth it!
Tuesday, July 14, 2009
An Unusual Zucchini Bread Recipe
 Image by bunchofpants via Flickr
I did make a couple of adjustments to the recipe. I could not find crystallized ginger on my shopping expedition this morning so I omitted that. I also used only half of the poppy seeds that the recipe called for, as well as only half the amount of curry powder. I did not have whole wheat pastry flour but had a little bit of whole wheat flour. I used a cup of whole wheat flour, 1-3/4 cups of all-purpose flour and 1/4 cup of ground flaxseed. I also substituted vegetable oil for the butter. The results were perfect. The bread came out wonderfully moist and delicious. You can actually taste the lemon zest and the hint of curry powder; the flavors married quite well. I will definitely make this a couple more times this summer, and freeze some for gifts.
Here's the link to the recipe:
http://www.101cookbooks.com/archives/my-special-zucchini-bread-recipe-recipe.html
I hope you enjoy this unique Zucchini Bread as much as Michael and I do. And make a double batch -- it is so worth it!
![Reblog this post [with Zemanta]](http://img.zemanta.com/reblog_e.png?x-id=01bd2c20-a3c6-44ce-b7de-ad245bffc1ef)
Monday, July 6, 2009
Fried Squash Blossoms
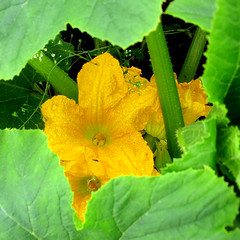 Image by docman via Flickr
Only pick the male blossoms (the ones without the fruit attached). Cut a bit of the stem as well so you have something to hold. Once you pick them they need to be used pretty quickly -- you will want to rinse them well to make sure there are no bugs, and remove the stamen from the centers. The flowers are quite fragile so be careful handling them. Lightly dry them, then dust with some flour. They then go into a batter made with the following ingredients:
4 eggs
1/4 c. flour
1/4 c. finely grated parmesan or romano cheese
1/2 tsp. salt
1/4 tsp. pepper
Beat the eggs well with a whisk; whisk in the flour and the cheese, the salt and pepper and mix well so that there are very few lumps. Drop the squash flowers into the batter and coat well. Heat about 1/4 cup extra virgin olive oil in a large saute pan over medium heat, and drop the squash flowers in; fry until golden brown and drain on paper towels. Sprinkle with a little salt and pepper and ENJOY!
This makes a great lunch, along with a green salad (of course with fresh ingredients from your garden!)
If you want to get really adventurous, try stuffing the blossoms with some cheese, or try some of the recipes in the following link. Mangia, y'all!
![Reblog this post [with Zemanta]](http://img.zemanta.com/reblog_e.png?x-id=527314f3-b377-4137-9f33-726cf4182d5c)
Sunday, June 28, 2009
More Garden Bounty
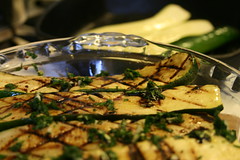 Image by bourgeoisbee via Flickr
Since I now have fresh onions, zucchini and yellow squash, I will fire up the grill this week to make my grilled vegetables. My peppers aren't ready yet and I don't have mushrooms, so I'll have to take a trip to the local produce stand to pick those up. Grilled vegetables are probably one of my favorite dishes -- lots of fresh chunks of fresh veggies, simply garnished with olive oil, salt & pepper and a little garlic powder. I always make sure to cut my vegetables up in nice-sized chunks so they don't fall apart on the grill. I use a grill pan so nothing falls into the fire. Here's my recipe:
- Fresh vegetables such as zucchini, yellow squash, onions, green and red peppers, mushrooms, asparagus, fennel
- Olive oil (just enough to coat all the vegetables)
- Salt, pepper and garlic powder
This recipe can also be done in the oven; again, make sure the vegetables are not crowded in the pan, and roast in a 425-degree oven. Turn after about 10 minutes and then cook about 10-15 minutes more until done.
![Reblog this post [with Zemanta]](http://img.zemanta.com/reblog_e.png?x-id=3be2d508-29d2-49f7-bdee-421a33207afa)
Wednesday, June 17, 2009
The First New Potatoes!

Michael harvested the first potatoes from the garden last night. I thought I would make some for dinner this evening, with lots of herbs from the garden.
Ingredients:
2 lbs fresh new potatoes
1/4 cup finely chopped fresh parsley and dill
2 T butter or margarine
Salt and pepper to taste
Clean and scrub the potatoes, removing all dirt; cut in half or quarters depending on size. Place in a large pot and cover with water. Boil for 10-15 minutes until just tender; drain but leave about 1/4 cup of the cooking water. Put back on a low burner and add the butter to melt. Remove from the burner and add the herbs; season with salt and pepper to taste. Transfer to a serving platter and serve.
Tuesday, June 9, 2009
"Fruitful" Coleslaw
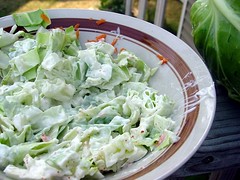 Image by shecodes via Flickr
Ingredients:
- 1 small head of cabbage, or 1/2 head large cabbage (if you grow your own pick them before they get too big -- they are definitely sweeter), shredded or chopped fine.
- 1 peach, peeled and diced in 1/2" pieces
- 1 Granny Smith apple, peeled and diced in 1/2" pieces
- 1/2 cup light mayonnaise (I like Duke's)
- 2 T apple cider vinegar
- 1 T sugar, or 3 packages of Splenda
Mix the mayonnaise, vinegar and sugar together in the bottom of a large bowl. Taste and adjust the vinegar and sugar to your preference. (The mixture should be smooth but not runny.) Add the cabbage and fruit and toss; season with a few sprinkles of salt. Cover and refrigerate for several hours before serving.
Note: I have been making this type of coleslaw for many years. If fresh fruit is not available, you can add some canned diced peaches or canned diced pineapple, drained well.
![Reblog this post [with Zemanta]](http://img.zemanta.com/reblog_e.png?x-id=fffe463e-5647-48bb-8ec3-7877bf718f59)
Saturday, June 6, 2009
Swiss Chard, Potato & Bean Ragout
 Image via Wikipedia
Ingredients:
1 can Great Northern Beans, rinsed and drained
A bouquet garni made with 1 bay leaf, a couple of sprigs of fresh thyme, and a Parmesan rind, tied together with kitchen string
Salt
1 generous bunch swiss chard (3/4 to 1 pound), or a combination of swiss chard and spinach
2 tablespoons olive oil
1 medium onion, chopped
2 to 4 garlic cloves (to taste), sliced
1 pound Yukon gold potatoes, scrubbed and cut into 1/2-inch dice
1 teaspoon fresh thyme leaves
Freshly ground pepper
1 to 2 tablespoons chopped fresh parsley (optional)
Freshly grated Parmesan cheese for serving
1. Add the beans to 3 cups of water in a casserole or Dutch oven. Bring to a simmer. Skim off any foam, then add the bouquet garni. Reduce the heat, cover and simmer 20 minutes. Add 1 teaspoon salt.
2. Meanwhile, stem and clean the greens in 2 changes of water. Rinse the chard stems and dice. Set aside. Cut the leaves in ribbons, or coarsely chop, and set aside.
3. Heat the olive oil in a heavy nonstick skillet over medium heat and add the onion and chard stems. Cook, stirring often, until tender, about 5 minutes. Add the garlic and continue to cook, stirring, until the garlic is fragrant, about 1 minute. Add the potatoes and stir together, then transfer to the pot with the beans. Bring back to a simmer, cover and simmer 30 minutes, or until the potatoes and beans are tender. Salt to taste.
4. Add the chard and thyme leaves to the pot, cover and simmer for 15 minutes. The chard should be very tender. Stir in freshly ground pepper to taste and the parsley. Taste, adjust seasonings and serve, passing the Parmesan to sprinkle on the top. Don't forget to remove the bouquet garni!
Yield: Serves 4 to 6
![Reblog this post [with Zemanta]](http://img.zemanta.com/reblog_e.png?x-id=8d0207ac-2a2a-4419-b1f1-108d0bb20e74)
Wednesday, June 3, 2009
"Herbalicious" Turkey Burgers
With an abundance of herbs growing in the garden these days, I thought I would add some to my turkey burgers. They came out so flavorful, I wish I would have made more to put in the freezer! Here's my recipe:
Ingredients:
1 lb ground white meat turkey, very lean
1/4 c. seasoned bread crumbs
1 egg
1/4 c. chopped fresh herbs (I used parsley, rosemary, dill and basil -- I didn't have any fresh thyme but I would have used it if I had it).
Salt & pepper
1 T. olive oil
Mix all ingredients together and form into four patties. Spray the patties with some cooking spray and place on a very hot charcoal or gas grill. Try not to flip them until the bottom has firmed up and browned. DO NOT OVERCOOK -- take off the grill while they are still juicy.
Note: Since the burgers are very lean, add cooking spray as needed or brush with a little olive oil so that they will not stick and will brown nicely. Since some of my family members aren't turkey burger fans (namely Jeremiah, my stepson), I usually cook up some beef burgers over the fire first, which gets the fire very hot with all the fat dripping off them.
Sunday, May 31, 2009
Bishop's Luncheon on Pentecost (Whittsunday)
Michael and I had the privilege of being received into the Episcopal Church this morning at our church, St. Andrew's in Canton. Our presiding bishop (Porter Taylor) was sick so the service was conducted by retired Bishop Bob Johnson. The service was beautiful and meaningful. There was quite a turnout, and a huge luncheon afterwards. I was asked to bring a finger food, so I decided to do some tea sandwiches. They turned out very tasty, but the next time I make them I will use a different bread (I used the cocktail bread which was very dry). Here is my recipe:
Pesto Tea Sandwiches
1 cup light mayonnaise
1/4 cup pesto (I used Alessi brand)
1/2 lb. provolone cheese, thinly sliced
1 head Romaine lettuce (or any type of tender green lettuce except iceberg)
1 loaf thinly-sliced white bread
Mix the mayonnaise and pesto together the night before making the sandwiches so the flavors can blend. To assemble the sandwiches, first trim the crusts off the bread. Spread a piece with a generous amount of the mayonnaise, add a slice of cheese and a lettuce leaf, top with another piece of bread spread with mayonnaise, and cut the sandwich into either halves of quarters.
Sunday, May 17, 2009
Garden-Fresh Pizza
I spent most of yesterday afternoon in the kitchen, making a whole-wheat dough. It was a triple-sized recipe, so I used one dough ball for bread, one for cinnamon rolls and one for pizza. I must say that it turned out pretty good but it was a lot of work. The next time I think I will lighten up the dough and use half bread flour, instead of all whole-wheat flour. Then maybe my bread won't be so brick-like.
I decided to make a veggie pizza, using some vegetables I already had in the fridge, as well as some I purchased. I also picked some basil leaves for garnish. I would have liked to have fresh tomatoes, onions, spinach and peppers from our garden to use on the pizza, but it's a bit too early in the season. Ah well, I will have plenty of opportunities this summer. This is what I used on the pizza:
1 large tomato, sliced thin
1 vidalia onion, sliced thin
1 red pepper, sliced into thin strips
1 pint white mushrooms, sliced
2 cloves garlic, chopped
1/2 cup freshly grated parmesan or romano cheese
1 cup shredded mozzarella cheese
1 tsp dried Italian seasoning or oregano
4-6 basil leaves, julienned
Salt & pepper to taste
Olive oil
Roll out or stretch the dough to about a 12-inch circle, crimping the edges; place on a baking stone or pizza pan. Let it rest for about 10 minutes.
In a 9 or 10-inch nonstick pan, heat about 1 tablespoon of olive oil over medium heat. Add the onions and peppers and saute for about 5 minutes until softened. Add the mushrooms and garlic and saute for a few minutes more, until lightly browned and softened. Set aside.
Drizzle about 1 tablespoon of olive oil over the dough and rub it all over, including the edges. Sprinkle half the parmesan cheese over the dough, then spread the onion/pepper/mushroom mixture on top. Next add the mozzarella cheese, then the tomato slices. Top with the remaining grated cheese, the Italian seasoning and the basil. Bake in a 425-degree oven for 15-20 minutes until browned and bubbling on top. For a crisper crust, place the pizza directly on the oven rack.
Of course, I served the pizza with a salad, with lettuces and radishes fresh from our garden. There is nothing better - and not an ounce of meat in the entire meal!
Note: I like to lay the tomato slices over the mozzarella cheese because the tomatoes can make the pizza crust watery. You can always save some of the mozzarella to sprinkle on top of the tomatoes with the parmesan cheese, if you like that cheesy top.
Monday, May 11, 2009
Yellow Squash
Ahhh, the fresh vegetables are starting to appear at the local markets. Michael and I volunteered at the Canton Community Kitchen yesterday (Mother's Day) and were sent home with cabbage, squash and onions. I decided today to use some of the squash and onions to make one of my favorite side dishes, Sauteed Squash & Onions.
This dish is incredibly simple and tastes delicious. It can get a bit watery since the squash is mostly water, but it makes a nice flavorful sauce. If you're bothered by onions making you cry when you cut them, make sure that you are using a very sharp knife. The easier the onion is to slice, the less the onion will "spray" its juice.
Ingredients:
2 lb yellow squash, sliced about 1/4" thick (large pieces should be cut in half)
1 large yellow onion, sliced in half-rings
1 T olive oil
1/2 t Seasoning Salt (more or less, to taste)
Directions:
In a large suate' pan with a tight-fitting lid, heat the oil over medium heat. Add the onions and cook slowly, about 5-7 minutes, until the onions are lightly browned and softened. Add the squash and the seasoning salt, saute for 1-2 minutes over medium heat, then cover the pan and turn the heat down to medium-low. Cook for another 5-7 minutes until the squash is tender but not mushy. Remove from the pan with a slotted spoon and serve. Garnish with some fresh chopped parsley.
Thursday, April 30, 2009
Shrimp & Grits -- with an Italian Flair!
I thought I would try my own spin on this Southern dish. I made it for Michael tonight and he loved it -- he said it was better than the Shrimp & Grits at Tupelo Honey Cafe. I don't exactly remember the measurements of the ingredients but I will try to approximate. This was a very economical dish; I found 12-0z packages of shrimp at Bi-Lo for $2.99 (I had to peel and devein them myself but it was worth it). I estimate that the entire dish cost about $4.00 for 2 people. I added a salad made with romaine lettuce from our garden to round out the meal; it was pretty delish. I also used some onions from the garden which were quite pungent, but mellowed out just fine when cooked. Here's the recipe:
The Grits:
3/4 cup regular grits (I don't like the quick grits but I guess they would work okay)
2 cups water
1/2 tsp salt
1 tablespoon butter or margarine
1/4 cup freshly grated parmesan or romano cheese
Salt & pepper to taste
The Shrimp:
12 oz shrimp, peeled and deveined (I used medium shrimp)
1 medium onion, finely chopped
2 cloves garlic, finely chopped
1 tablespoon olive oil
1/2 tsp Old Bay seasoning
1/4 tsp paprika
2 tablespoons lemon juice
2 tablespoons chopped fresh parsley
Bring water to boil in a saucepan for the grits; add salt. Slowly add grits and bring heat down to a slow simmer; cover the pan. Cook for about 6-8 minutes or until all the water is absorbed and the grits are soft but not soupy.
In the meantime, heat the oil in a large skillet over medium heat. Add the onion and cook slowly for about 5 minutes until the onion is lightly browned and tender (if it dries out add a little more oil). Add the garlic and saute for another minute -- make sure it doesn't burn. When the onion and garlic is cooked, scoop out about 1/2 of the mixture and set aside (you will add this to the grits). Add a touch more oil, then add the shrimp; sprinkle the Old Bay and the paprika over the shrimp and saute just until the shrimp turn pink - about 2 minutes. Sprinkle the lemon juice over the shrimp, cover the pan and take it off the burner.
Add the reserved onions and garlic to the cooked grits, as well as the butter and the grated cheese; stir until everything is incorporated. To serve, spread the grits on a serving platter, then pile the shrimp mixture on top of the grits. Top with chopped parsley. Enjoy!
Sunday, April 19, 2009
Pasta and Garbanzo Beans
This is a great inexpensive dish that mama used to make for us when she was out of meat. It's vegeterian and delicious!
Ingredients:
3 cups of Italian Marinara Sauce (either homemade or from a bottle)
1/2 onion, finely chopped
3 cloves garlic, finely chopped
1 T. extra-virgin olive oil
1 can garbanzo beans, drained and rinsed
12 oz ditalini pasta - or any small shape of your choice
1 t. salt (for pasta water)
1/2 c. freshly-grated romano cheese (or parmesan if you can't find romano), plus more to pass at the table
1/4 c. fresh Italian flat-leaf parsley, finely chopped
Fill a large stockpot or pasta pot with water and set the burner on high. Meantime, heat the oil in a large saute pan over medium heat. Add the onion and cook slowly for about 5-7 minutes, until the onion is lightly browned and soft. Add the garlic and saute for another minute, just until heated through and fragrant. Remove from the burner, let cool for a minute, then add the marinara sauce and return to the burner. Bring up to a low boil; add the garbanzo beans and lower the heat to medium-low, then cover. While the sauce is simmering, add the salt to the pasta water (which should be boiling by now) and cook the pasta to the al dente stage; drain.
Place the pasta in a large bowl and ladle a generous amount of the sauce over it, as well as the romano cheese and parsley. Toss lightly and serve immediately. MANGIA!
Wednesday, April 15, 2009
FRESH TOMATO-HERB TOPPING
This is a very versatile dish. Use as a topping for slices of grilled French bread; serve over grilled chicken, fish or shrimp; or serve over cooked pasta.
2 c. ripe tomatoes (about 4 whole), diced in small pieces, or 2 c. canned, petite-diced tomatoes
½ sweet onion, finely chopped
1 garlic clove, finely chopped
6 basil leaves, finely chopped
3 mint leaves, finely chopped
2 sprigs Italian parsley, finely chopped
1 T extra virgin olive oil
1 T balsamic vinegar
Salt and pepper to taste
Mix all ingredients together; let stand for 10 minutes. This can be refrigerated for about a week. Makes about 2-1/2 cups; very figure-friendly!
SAUTEED GREENS
This recipe is best with small, tender greens fresh-picked from the garden. If you don't grow them yourself, visit your nearest farmer's market or local produce vendor. You won't be sorry!
1 sweet yellow onion, sliced thinly into rings
1 T olive oil
2 cloves garlic, minced
6 cups fresh greens (Spinach, Swiss Chard or Kale), washed thoroughly*, tough stems removed and torn into smaller pieces
2 T soy sauce
In a large stockpot (6-quart or larger), heat the olive oil on medium heat. Add the onion and cook slowly over medium-low heat, until the onion is golden brown and soft - about 10 minutes. Add the garlic and cook for another minute or so until the garlic is soft but not burnt. Add the greens, stirring them into the onions with a pair of tongs. If they don't all fit into the pan at once, let them cook down for a minute or so and add the rest to the pan. Add the soy sauce and toss the greens, then cover the pan and let the greens cook for about 6-10 minutes until tender, stirring occasionally. Add salt and pepper to taste. Makes about 2 cups of greens - enough for two people.
*A note about washing greens: the best way is to use a large bowl or washtub, or sanitize one side of a double-bowl sink. Fill it with water and soak the greens. Remove the greens to a big bowl, drain the water and fill the bowl or sink again with clean water and repeat. Do this until the water is clear. This should remove all the dirt and sand from the underside of the leaves where it collects. It also protects the greens from being torn up by rinsing them directly under water.
This recipe is best with fresh greens from the garden - small leaves are the sweetest and most tender so try not to get leaves that are too large. 1 sweet yellow onion, sliced thinly into rings
1 T olive oil
2 cloves garlic, minced
6 cups fresh greens (Spinach, Swiss Chard or Kale), washed thoroughly*, tough stems removed and torn into smaller pieces
2 T soy sauce
In a large stockpot (6-quart or larger), heat the olive oil on medium heat. Add the onion and cook slowly over medium-low heat, until the onion is golden brown and soft - about 10 minutes. Add the garlic and cook for another minute or so until the garlic is soft but not burnt. Add the greens, stirring them into the onions with a pair of tongs. If they don't all fit into the pan at once, let them cook down for a minute or so and add the rest to the pan. Add the soy sauce and toss the greens, then cover the pan and let the greens cook for about 6-10 minutes until tender, stirring occasionally. Add salt and pepper to taste. Makes about 2 cups of greens - enough for two people.
*A note about washing greens: the best way is to use a large bowl or washtub, or sanitize one side of a double-bowl sink. Fill it with water and soak the greens. Remove the greens to a big bowl, drain the water and fill the bowl or sink again with clean water and repeat. Do this until the water is clear. This should remove all the dirt and sand from the underside of the leaves where it collects. It also protects the greens from being torn up by rinsing them directly under water.
Subscribe to:
Comments (Atom)